Care and Maintenance
 OK, now you own a cool new (old) analog tape deck. The first thing to know is that tape recorders should be aligned before every session! The tape path should be cleaned every time you change a reel of tape, or more frequently. I often clean the heads before playback of each song during mastering.
If you own an analog tape deck, you should also own the several items needed to align it:
- a test tape for each speed and tape width you plan to use. Get MRL test tapes – they are the best
- an oscillator (you can use the software signal generator plugin you probably already have)
- an oscilloscope (very handy for adjusting head azimuth – your workstation might have a plug-in that simulates an XY ‘scope)
- a Han-D-Mag head demagnetizer-no other brand will do!
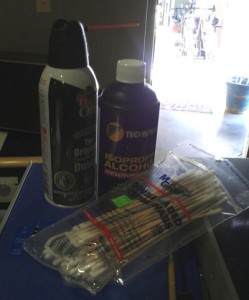
- a supply of cotton-tipped swabs and isopropyl alcohol (click here to learn how to store it safely)
Find someone (like the technician mentioned in Part One of this series) who can walk you through the alignment process. This is essential if you want your recordings to be as good as possible.
Proper Operating Levels
Next, decide on an operating level for your tape. This is a value, measured in nanoWebers per meter, or the strength of the signal being fed to the tape. Way back when, standard tapes were designed for a level of 185nW/m. High output tapes raised that by 3 dB to 250nW/m. Modern tapes can take up to +9dB above 185nW/m. I prefer to work at +6 which is a good compromise between adequate headroom and good signal to noise ratio. If you plan on pounding the tape with level to get that warm, punchy analog sound, you will probably be disappointed. In my experience, hitting the tape really hard makes things mushy sounding. (An exception might be individual tracks on a multitrack tape.)
See you again next week for studio set-up specifications!
Also see Part 1: What to Know Before You Buy and Part 3: Studio Settings and Collaboration
