

GUEST POST BY TIM RUDDELL
We grabbed this info from Tim’s Google Doc that he generously shared.
Here’s the original link: https://docs.google.com/document/d/1YFH7_Hjzh89VlF16MeX_FJAWOdYpbCbrKr5TFD0OX2k/edit
Or read on:
• Download the Zoom app.
• Use a desktop/laptop computer, not a cellphone.
• Connecting to your router with an ethernet cable vs. wifi is great, if you have that option.
• An external mic connected to your computer will provide much better sound quality than internal laptop mics.
• Ideally you will have at least 3.0Mbps up & downstream internet connectivity. You can check at speedtest.net.
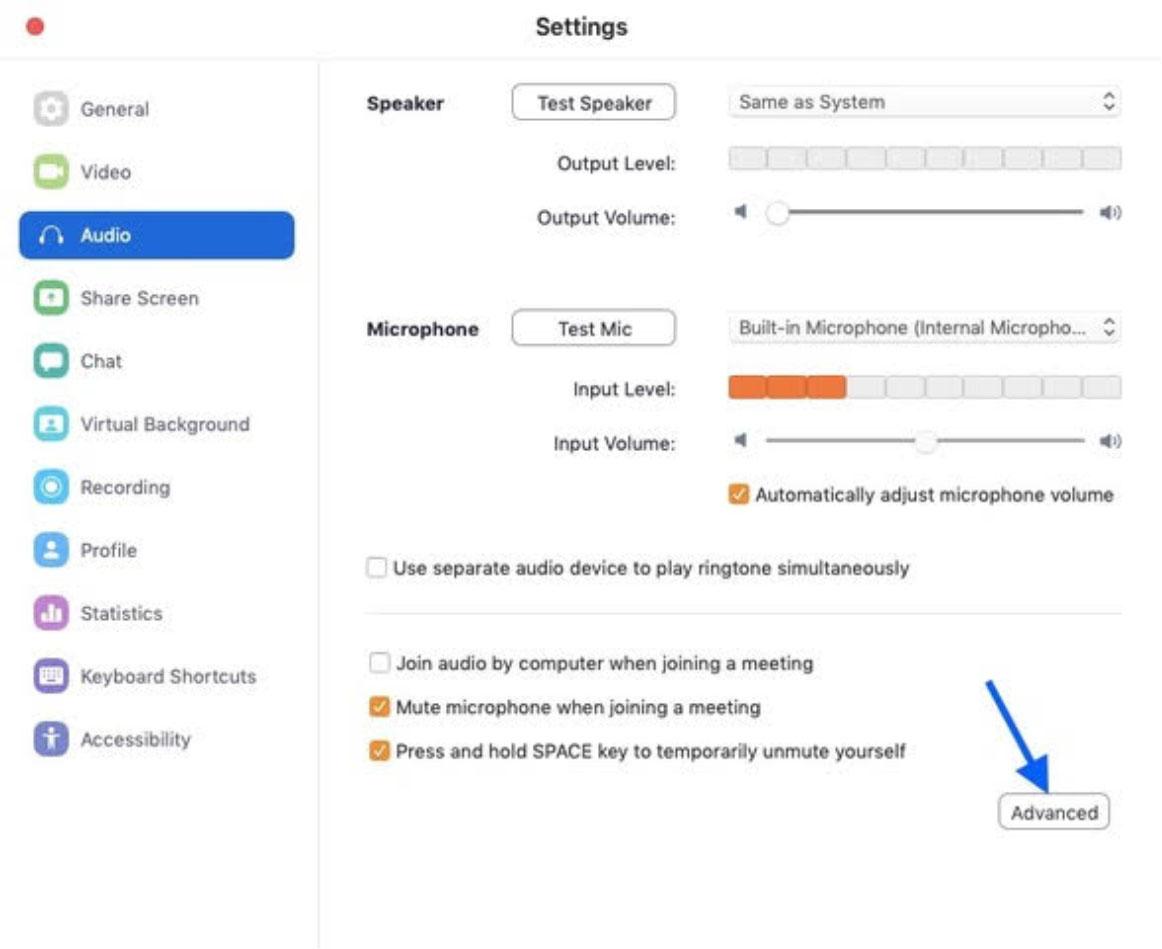
• Adjust the settings below, one of which needs to be re-set each time you open the app and at the start of the event.
- Select your external microphone (if you’re using one) as your audio source,
- Set the “Automatically adjust microphone” setting in Zoom
- In settings, go to Advanced.
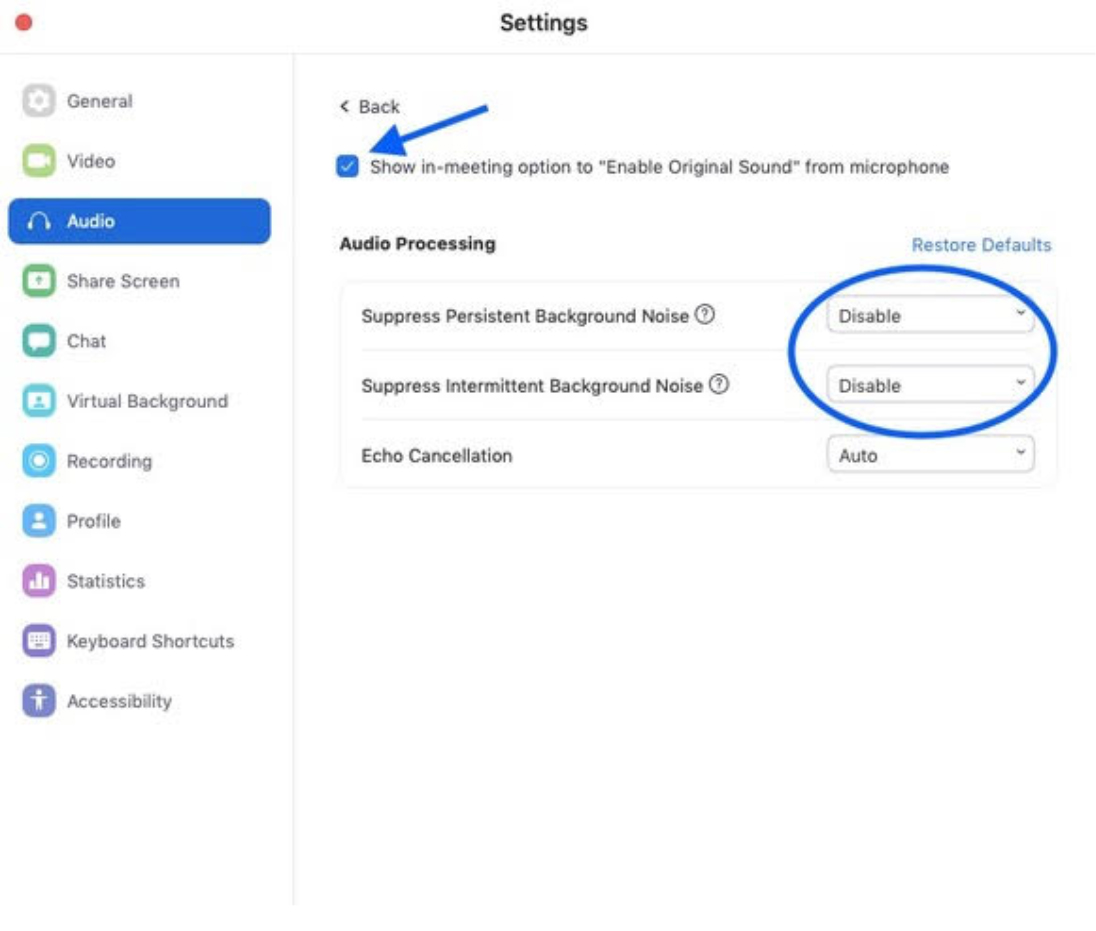
- Then check “Show in-meeting option” to “Enable Original Sound” from microphone.
- Make sure Suppress Persistent Background Noise is disabled.
- Make sure Suppress Intermittent Background Noise is disabled.
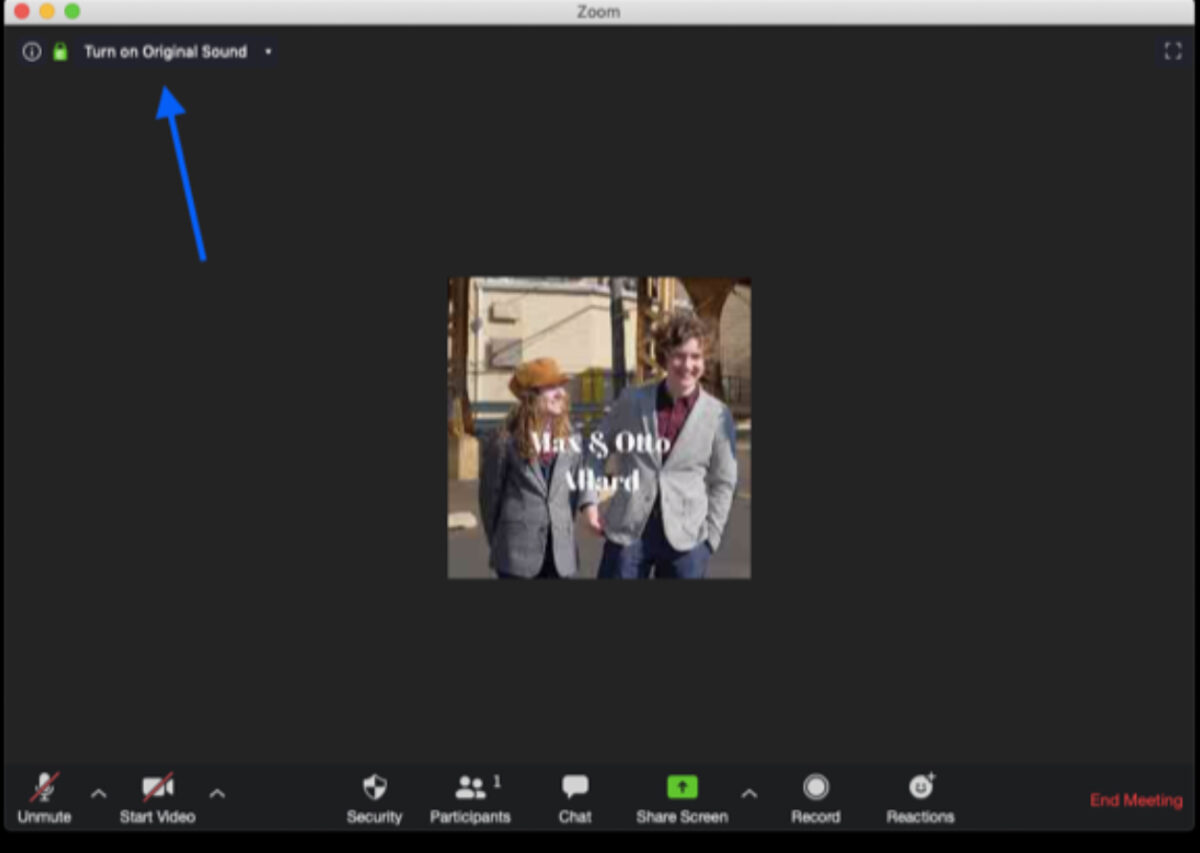
- During the actual video conference, be sure to “Turn on Original Sound.”
NOTE: CHECK THIS EVERY TIME YOU START THE APP, BECAUSE IT DEFAULTS TO OFF
These tips may save the day when a friend asks you to Zoom their wedding!